21 April 2023
The Zeebrugge Raid at 105: The Trials & Tragedy of a daring amphibious assault
On St. George’s Day, 1918, British marines launched one of the most daring operations of World War One. This is the story of the Zeebrugge Raid.
The Zeebrugge Raid
Where is Zeebrugge and why was the port fought over in World War One?
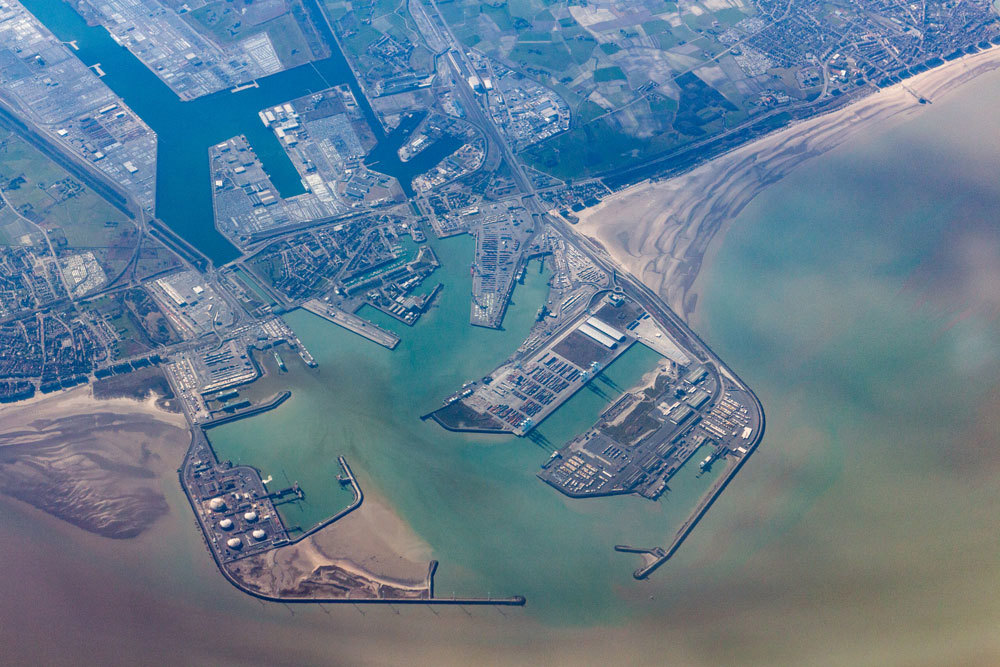
The Belgian port of Zeebrugge as it stands today. In 1918, it was the site of one of the most daring operations of World War One (Wikimedia Commons)
Zeebrugge, today the port of Bruges-Zeebrugge, is an important maritime hub on the Belgian North Sea coast.
Like its fellow French Atlantic and other Belgian North Sea ports, Zeebrugge was a choice prize for the belligerents of World War One.
It has a natural deep berth, is located close to Great Britain, and sits at the mouth of the Bruges Canal network. Belgian’s great cities, such as Antwerp, could be supplied by Zeebrugge, but the port could also be used to launch craft out to sea too.
Zeebrugge had been captured by the Imperial Germany Army during its first great advance into Belgium in 1914. For the Royal Navy, this was a major source of consternation.
Despite the Royal Navy’s blockade of German ports following the Battle of Jutland in early 1915, Belgian water ways still allowed small German warships an outlet to the sea.
But there were worse dangers facing the British stationed at Zeebrugge and nearby Ostend: the dreaded U-boats.
The submarine menace
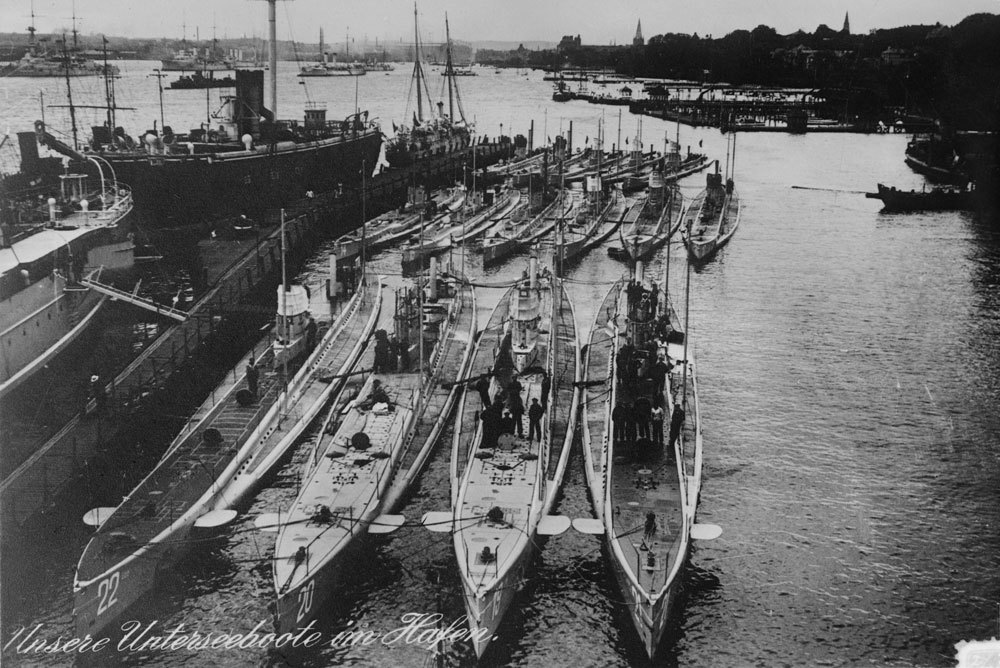
Great War German U-boats in harbour (Wikimedia Commons)
The Imperial German Navy (Kaiserliche Marine) was one of the first maritime military organisations to grasp the potential of submarine warfare.
Since 1915, German U-boats had been operating a campaign of unrestricted submarine warfare across the world, particularly in the English Channel and the Atlantic Ocean.
Able to hunt in packs and strike without warning at slow, cumbersome merchant vessels, the U-boats were an incredibly dangerous foe.
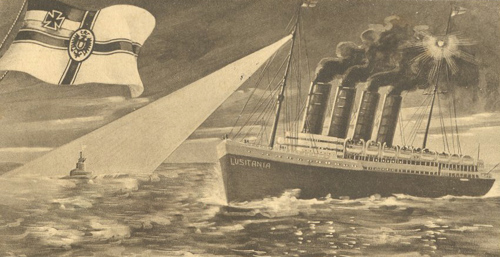 Image: A WW1 German postcard showing the infamous sinking of the Lusitania (Wikimedia Commons)
By the end of the war, German submarines would account for 13 million tons of sunken British naval shipping alone.
The threat of U-boats on merchant shipping was existential.
Britain was reliant on imports, particularly of food, to keep up its war effort. Cutting its Atlantic supply lines, it was hoped, would starve Britain in much the same way the Royal Navy blockade in the Baltic aimed at starving Germany.
By 1917, it looked like Britain was on its knees. While the U-boat campaign would eventually trigger the United States’ entry into the war, it would be many months before its men would reach Europe.
A solution to the submarine menace had to be found.
Convoy and naval tactics would adapt but what about striking submarines at the source and blocking their access to the sea?
So the seeds of the daring Zeebrugge Raid were sewn in the minds of British military planners. The Zeebrugge Raid began to germinate.
Planning the Zeebrugge Raid
Members of the Admiralty had been considering amphibious landings along the Belgian coast since the end of 1916.
Seaborne assaults had generally not gone to plan for the Allies during World War One. The landings at Gallipoli, Turkey, in April 1915 had turned into a costly, bloody affair.
There were also difficulties in protecting supporting warships and the general vulnerability of the assault troops to consider too.
Nevertheless, an attack on Zeebrugge remained in the Admiralty’s thoughts.
 Image: Vice-Admiral Sir Roger Keyes, the brains behind the Zeebrugge Raid (Wikimedia Commons)
Vice-Admiral Roger Keyes was assigned as director of the Admiralty Plans Division in October 1917.
Keyes submitted plans for blocking Zeebrugge and her sister port Ostend in December 1917. Keyes’ plan drew on ideas submitted by Vice-Admiral Sir Reginald Bacon to bombard Zeebrugge from the sea.
Commodore Reginald Tyrwhitt also suggested blocking Zeebrugge in 1916.
Ultimately, Keyes had “an absolutely free hand, not only to make my own plans for the blocking of Zeebrugge and Ostend.”
In Keyes’ final plan, the Royal Navy would sink obsolete, concrete-filled ships in Zeebrugge to block the harbour mouth.
The sunken ships would halt submarines from accessing the North Sea and slipping through British minefields out into the Channel and the Atlantic.
At the same time, a battalion of seaborne assault troops would land on the mole around Zeebrugge to disable its coastal defences.
The Zeebrugge mole was a mile-long seawall jutting out into the North Sea. Several German sea-facing artillery guns were placed on the mole and had to be taken out for the plan to be a success. It was also studded with concrete machine gun posts.
Several heavy smokescreens would be laid down in front of supporting ships to disrupt enemy visibility.
From the off, Keyes’ plan was complex. It relied on tactics that had yet to be truly tested in the field. The plan also relied on good weather and sea conditions.
The men of Zeebrugge
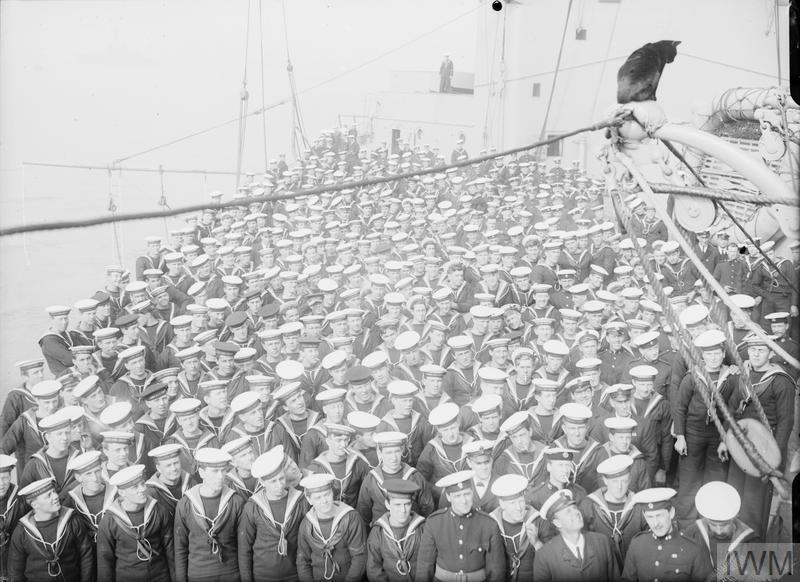
The Zeebrugge Raiders were all volunteers (© IWM Q 55568)
Although the Royal Marines had been an institution for over a century prior to World War One, there was no established seaborne special operations force in the Royal Navy.
Ultimately, the Zeebrugge Raid's success would require two attacks featuring 165 Royal Naval vessels and 1,700 Royal Marines and naval personnel.
The amphibious assault force and ship crews were drawn from volunteers.
The force assembled to hit Zeebrugge reflected the forces fighting by Britain and the Commonwealth across the Great War. Volunteers came from the UK, as well as Australia, New Zealand, and Canada.
The naval complement of the Zeebrugge raid involved many smaller motor launches, analogues to torpedo boats, as well as larger cruisers and monitors, and even British submarines.
HMS Vindictive was the ship chosen to land the raiding party on the mole. She was captained by Captain Alfred Carpenter.
23rd April 1918: The Zeebrugge Raid is launched
 Image: Position of the Zeebrugge mole, the positions of key vessels, and the target locations of the blocking ships (Wikimedia Commons)
Several abortive attempts had been made to launch the raid at Zeebrugge prior to 23rd April. However, weather conditions and visibility proved poor, so the operational date was pushed back.
Eventually, on 22nd April, the force sailed out of the UK and headed to the Belgian coast. The wind held fair and the vessels formed up.
The warships assembled opened fire on Zeebrugge, pounding its defences. They also laid down the smokescreen vital for concealment and the success of the mission.
Just before midnight of the 23rd, Rear-Admiral Keyes signalled “St. George for England” using blinker lights. The attack was on.
HMS Vindictive headed towards the mole, followed by two old River Mersey ferries Daffodil and Iris.
Sophisticated German sound-detecting equipment, and the thick smokescreen, alerted the defenders to the incoming raid. The artillery guns were locked and loaded. The German troops were ready.
Attacking the Zeebrugge mole
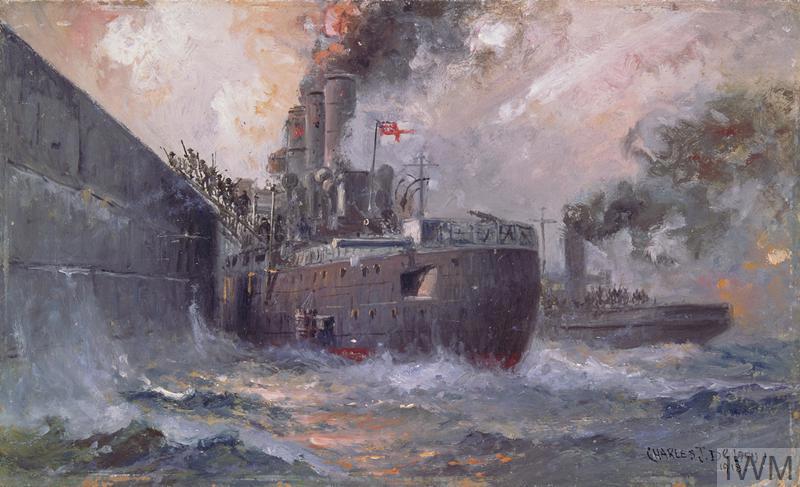
The Vindictive at Zeebrugge: Storming the Zeeburgge Mole, Charles John de Lacy, 1918 (© IWM Art.IWM ART 871)
Vindictive emerged from the smoke and began heading towards the mole, Daffodil and Iris in tow. Meanwhile, swarms of Royal Navy motor launches attacked the western end of the mole to distract German fire.
Just as the ships were moving into position, the fickle wind changed direction. The protective smokescreen was blown away, leaving Vindictive and her Royal Marine passengers vulnerable to German counterfire.
Vindictive was hit but a furious fusillade of artillery fire, taking many hits. Writing of his experience, Captain Carpenter said:
“They literally poured projectiles on us. In about five minutes we had reached the mole, but not before the ship had suffered a great amount of damage to material and personnel.”
The Marine landing parties were meant to surge up gangways and ramps on the mole and push onward. With visibility now total, they were easing picking for German machine gunners.
Sergeant Harry White of the Royal Marines described the scene:
“Up the ramp we dashed, carrying our ladders and ropes, passing our dead and wounded lying everywhere, and the big gaps made in the ship’s decks by shellfire.
“Finally, we crossed the two remaining gangways, which were only just hanging together, and jumped onto the concrete wall, only to find it swept by machine-gun fire.
“Our casualties were so great before the landing that of a platoon of 45 men only 12 landed.”
Vindictive was now further away from the mole and the German defensive positions as planned. However, Daffodil and Iris had managed to come in unscathed.
Daffodil pushed Vindictive into position while Iris attempted to land her men on the Royal Navy cruiser to reinforce Vindictive’s landing parties.
C3 sneaks in
While the German gunners were targeting Vindictive they failed to spot the British Submarine C3. She was an older class and obsolete but was still central to the Zeebrugge plan.
C3 had been packed with explosives, 5 tons’ worth, with the intention of ramming the viaduct that connected the mole to the mainland.
Running on the surface, the British sub hit the viaduct. By now, the German defenders’ attention turned to C3 and began peppering the boat with gunnery. Her crew lit the fuses, made for a small boat, and attempted to escape.
C3 quickly went up in an orange fireball, severely damaging the port’s viaduct.
In come the blockships
Three British ships then emerged from the smoke and poured into Zeebrugge harbour.
HMS Thetis, Intrepid and Iphigenia had orders to run through German gunfire, into the canal and into the harbour proper. There, they would be scuttled, blocking the entrance to the North Sea.
Unable to turn broadside across the channel, Thetis hit a sandbank and became grounded.
Intrepid was able to turn broadside and moved to block the channel. However, the channel was wider than the British ship, leaving gaps.
Iphigenia managed to get closest to the canal locks at Zeebrugge but had not been ordered to ram them. Instead, her crew jettisoned and made to escape in small boats. They were picked up by motor launches.
Carnage on the mole

The crew of HMS Vindictive aboard the ship back home in Dover. Vindictive landed troops on the mole at Zeebrugge (© IWM Q 55568)
Meanwhile, the Royal Marines on the mole were caught in brutal close-quarters fighting.
A hail of machine-gun fire swept the structure while shell and mortar fire fell on the heads of the stricken Marines.
Captain Carpenter sounded the retreat. The Marines began a fighting withdrawal back to the relative safety of Vindictive.
While falling back the Marines were covered by the Royal Navy destroyer HMS North Star. As she was drawing alongside the mole to provide covering fire, North Star was struck several times by coastal gunfire. She began to sink.
The surviving crews, Marines, and vessels began to pull back.
From start to finish, the Zeebrugge raid lasted just 150 minutes.
Was the Zeebrugge Raid a success?
There is no doubting the bravery and daring of those involved in the Zeebrugge Raid.
Such an operation of its kind had never been tried before.
The Great War was a kind of military laboratory where new tactics, strategies, and operations were tried. It was no surprise that a plan of Zeebrugge’s complexity had several snags.
From a military standpoint, Zeebrugge did little to restrict German North Sea access. The port was only inaccessible for a few days.
At nearby Ostend, the situation was similar. Blocking ships were scuttled without reaching their assigned points. Smaller German warships and U-boats could navigate canal outlets to bypass the sunken vessels and reach the sea.
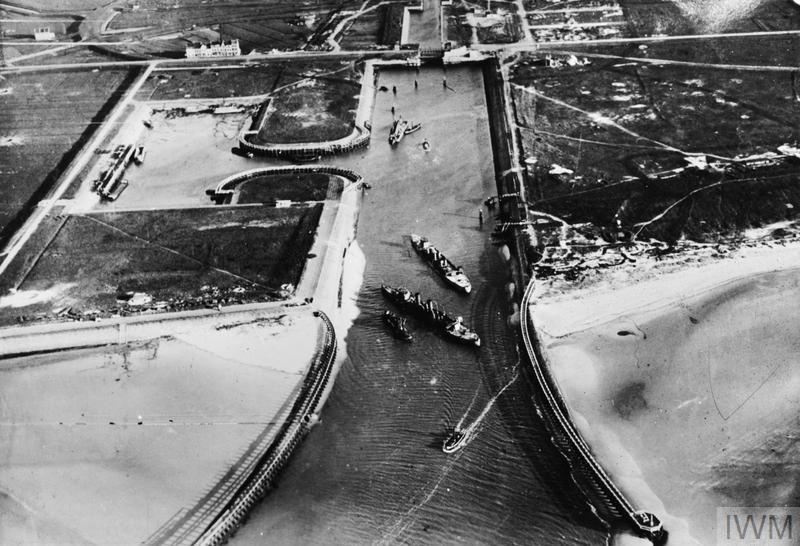
Two of the blocking ships in Zeebrugge canal mouth. The port was only out of operation for a few days before Germany restarted U-boat operations (© IWM Q 67725)
But in propaganda and moral terms, Zeebrugge was huge.
Then British Minister of Munitions Winston Churchill suggested it “may well rank as the finest feat of arms in the Great War.”
The boldness of the operation and the courage of the men involved were lauded across the country.
The public and government authorities alike praised the more aggressive tactics, which contrasted with the general cautious stance adopted by the Royal Navy for most of the war.
Vice-Admiral Keyes was knighted shortly after the operation. But
A full 11 Victoria Crosses, Britain’s highest military medal, were awarded to raid participants: 8 at Zeebrugge and a further 3 for the action at Ostend.
These were a mixture of posthumous awards and medals given to those who managed to come back.
Interestingly, the entire 4th Battalion Royal Marines was awarded the VC. As this was against the rules of how Victoria Crosses were assigned, the members of the battalion voted to see which two men would be given the award.
The battalion elected to decorate Sergeant Norman Finch and Captain Edward Bamford.
Captain Carpenter, skipper of the Vindictive, also received the Victoria Cross for his part in the raid.
More than 500 other awards and memorials were given out to Zeebrugge raiders, including:
- 143 Distinguished Service Medals
- 283 Mentions in Despatches
Casualties of the Zeebrugge Raid
Unfortunately, the morale victory came at a cost.
The exposure to gunfire on the mole, coupled with the cleaning of the smokescreen and the general riskiness of the operation, resulted in heavy casualties for the British and Commonwealth forces.
Of the 1,700 personnel involved, around 300 were wounded. 200 would not make the return trip to the UK.
Those 200 men are commemorated by the Commonwealth War Graves Commission. Those commemorated in Belgium are buried at:
4 casualties with no known graves are commemorated on the Zeebrugge Memorial within Zeebrugge Churchyard.
Royal Navy casualties of the raid with no known grave are variously commemorated on the Royal Naval memorials at Chatham, Portsmouth, and Plymouth.
Otherwise, men who died of their wounds during the battle, and are buried in the UK, are mostly commemorated in Dover (St. James’s) Cemetery, or in individual war graves around the country.
Below are a handful of casualty stories for the Zeebrugge Raid.
Wing Commander Frank Arthur Brock
 Image: Wing Commander Frank Arthur Brock (Wikimedia Commons)
Frank Arthur Brock served in a variety of officer roles in the Royal Navy throughout his career. By the time of Zeebrugge, Brock was serving with the Royal Navy Air Service as a Wing Commander.
Brock had a keen eye for innovation and technological development. He was part of the Admiralty Bored of Invention and Research, under which he helped pioneer several innovations.
One, the Brock Bullet, was an incendiary round designed to take down German airships. The first Zeppelin shot down during World War One was felled by a Brock Bullet.
The smokescreen at Zeebrugge was also a Brock innovation. Calcium phosphide cakes were fed in welded compartments into the funnels and chimneys of the ships. Once heated, these created enormous smoke clouds the ships could use to hide behind.
At Zeebrugge, Brook was anxious to learn more about the German sound-ranging technologies stationed there. Brook took part in one of the mole-storming parties and was killed in action.
According to some accounts, Brook lost his life in a close-quarter cutlass fight against German sailor Hermann Künne. Künne slashed Brook’s neck, fatally wounded the British airman, but was wounded in return.
As Brook’s body was not recovered he is commemorated on the Zeebrugge Memorial.
Stoker 1st Class Arthur Fletcher ADA
Arthur Fletcher joined the Royal Navy in September 1916.
His training took him to various naval stations across the country, including Chatham in Kent, before he was assigned to HMS Phoebe.
At Zeebrugge, reports state Arthur had left his watch to go below deck and help survivors of a stricken vessel when he was hit by a shell blast. He later died of his wounds.
Arthur had a history of putting himself forward for extra service. For example, he was involved in setting up the Volunteer Training Corps before his untimely death.
Today, Arthur is buried in Maidenhead (All Saints) Cemetery, only a short distance from Commonwealth War Graves head office.
Lieutenant-Commander George Bradford VC
 Image: Lieutenant-Commander George Bradford VC (Wikimedia Commons)
Incredibly bravery appears to be a Bradford family trait.
George’s brother, Brigadier-General Roland Bradford, was also awarded the Victoria Cross during World War One. The Bradfords were the only brothers to be awarded Britain’s highest military award for bravery during the Great War.
In George’s case, his posthumous award came during the raid on Zeebrugge while serving with the Royal Navy.
His VC citation reads:
“This Officer was in command of the Naval Storming Parties embarked in Iris II. When Iris II proceeded alongside the Mole great difficulty was experienced in placing the parapet anchors owing to the motion of the ship.
An attempt was made to land by the scaling ladders before the ship was secured.
Lieutenant Claude E. K. Hawkings (late Erin) managed to get one ladder in position and actually reached the parapet, the ladder being crushed to pieces just as he stepped off it. This very gallant young officer was last seen defending himself with his revolver. He was killed on the parapet.
Though securing the ship was not part of his duties, Lieut.-Commander Bradford climbed up the derrick, which carried a large parapet anchor and was rigged out over the port side; during this climb the ship was surging up and down and the derrick crashed on the Mole.
Waiting for his opportunity he jumped with the parapet anchor onto the Mole and placed it in position.
Immediately after hooking on the parapet anchor Lieut.-Commander Bradford was riddled with bullets from machine guns and fell into the sea between the Mole and the ship.
Attempts to recover his body failed. Lieut.-Commander Bradford's action was one of absolute self-sacrifice; without a moment's hesitation, he went to certain death, recognising that in such action lay the only possible chance of securing Iris II and enabling her storming parties to land.”
While his citation states that Lieutenant-Commander Bradford’s body was not recovered, this is not true. He is interred at Blankenberge Town Cemetery.
As well as his brother Roland, another of George’s brothers was killed during the war: Second Lieutenant James Bradford.
Learn more stories of World War One casualties with Commonwealth War Graves
Our search tools can help you uncover more stories of those commemorated by the Commonwealth War Graves Commission.
Use our Find War Dead tool to search for specific casualties by name, where they served, which branch of the military they served in, and more parameters.
Looking for a specific location? Use our Find Cemeteries & Memorials search tool to find all our sites. You can search by country, locality, and conflict.

