27 November 2023
Across the Rushing Water: The Moro River Campaign
Crossing the Moro was an important part of Eighth Army’s move up Italy’s Adriatic Coast. Learn more about the Moro Campaign and the men who fought it with CWGC.
The Moro River Campaign
Moro River Canadian War Cemetery


A short drive from the charming seaside town of Ortona along the beautiful Adriatic Coast you’ll find, perched atop high ground just near the sea, the Moro River Canadian War Cemetery.
Some 1,600 Second World War Commonwealth burials rest here, each war grave marked with a sturdy stone headstone. The majority are Canadians, but the Commonwealth is widely represented amongst the dead.
British, Indians, South Africans, Australians, and New Zealanders all lie in the serene tranquillity of Moro River Canadian War Cemetery.
The incredible CWGC horticultural teams in Italy do an amazing job of ensuring our Italian sites remain stunningly peaceful places of reflection and remembrance.
But of course, the serried rows of headstones tell us that, during the Second World War, the towns and villages around the Moro River were alive with carnage and chaos.
Crossing the Moro
The Allies in Italy
By September 1943, the Allies had landed on mainland Italy after stunning successes in capturing the island of Sicily.
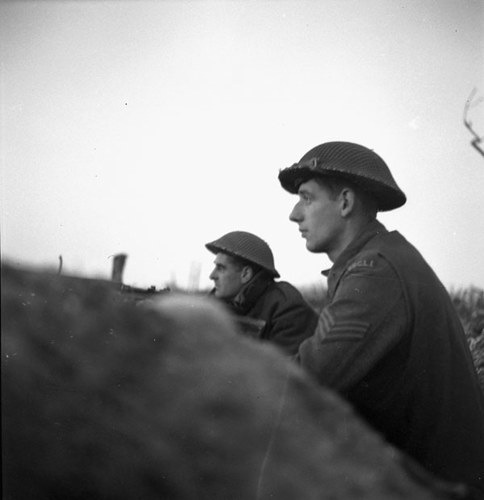 Image: Two Canadian soldiers scan the Italian horizon (© Libraries & Archives Canada)
By targeting Italy, the Allies sought to draw German forces away from the Eastern Front and France in preparation for D-Day the following year and knock Fascist Italy out of the war.
The Italians had signed an armistice with the Allies concurrently with the invasion, but German forces stayed put. Dislodging them would prove a long, bloody process.
For this very reason, the Italian Campaign is often considered one of the toughest European theatres of the Second World War.
Progress through southern Italy was initially rapid, despite stiff Wehrmacht resistance.
By the end of October, the Allies had reached the formidable German defensive position known as the Gustav Line, which stretched from the river Garigliano in the west to the Sangro in the east.
Breaching the Gustav Line would be vital for pushing up the Italian peninsula.
British Eighth Army under the command of General Bernard Montgomery fighting its way up the Adriatic coast reached the Sangro and crossed it by November 30th.
The next obstacle was the Moro River.
Attacking the Moro River
The Moro River runs from Italy’s mountainous spine, flowing toward Ortona and finally the Adriatic.
In 1943, the river crossings south of Ortona were centrepieces of the Wehrmacht’s Gustav Line defences.
By cracking them, Montgomery hoped to capture Ortona, push on to Pescara further up the coast, and finally swing onward to Rome.
While the British 78th Infantry had been Eighth Army’s V Corps’ spear tip, it was replaced for the Moro Offensive by the 1st Canadian Infantry Division. The Canadians were tasked with crossing the river before pushing on to take Ortona itself.
Elsewhere, the 2nd New Zealand Division was tasked with capturing Orsogna: a town further inland.
Between the Canadians and the Kiwis lay the 8th Indian Infantry Division. The 5th British Infantry Division was also in support.
Initial attacks
The first attacks on the German lines on the Moro came at 00.00 on the night of the 5 December 1943.
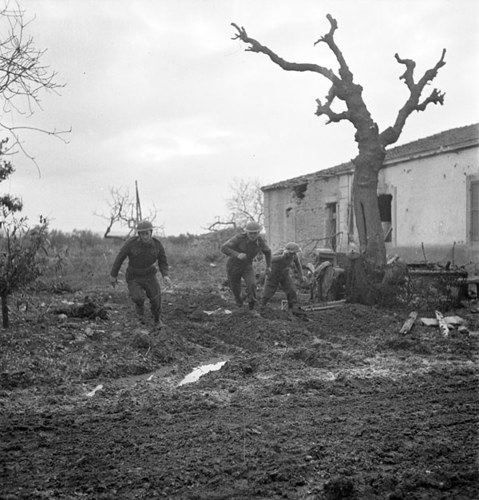 Image: Canadian soldiers react to a German counterattack at San Leonardo (© Libraries & Archives Canada)
Princess Patricia’s Canadian Light Infantry went across the river moving towards the village of Villa Rogatti. Soon vicious fighting had broken out, but the Canadian soldiers were able to steadily take the town and establish a beachhead on their side of the river.
Three German formations surrounded Villa Rogatti. With chances of a breakout unrealistic, the Canadian attack was moved elsewhere, and the Indian infantry moved up to plug the gap.
Elsewhere, the Seaforth Highlanders of Canada crossed the Moro with the objective of taking San Leonardo. Compared with Villa Rogatti, San Leonardo offered stiffer resistance.
A beachhead was established by the Hastings and Prince Edward Regiment by late afternoon, but its position was shaky. Even so, the regiment was able to get its ant-tank guns across the river in time to beat off a determined German counterattack to hold beachhead.
An attack up the coastal road by the Hastings and Prince Edward Regiment also ran into trouble at the coastal hamlet of San Donato. The advance stalled.
Capturing the Moro
Despite tough German resistance, the Canadians had managed to get toeholds on the north side of the Moro.
On December 8, Major General Vokes, commander of the Canadians, put into action a new plan:
- The 48th Highlanders and Princess Paricia’s Canadian Infantry would continue the attack on San Leonardo
- The Royal Canadian Regiment (RCR) would break out of the beachhead and move southwest to link up with the other regiments at San Lorenzo
The attack began at 16.00 with a sky-splitting artillery barrage. For two hours, German positions along the river were peppered with intense shellfire.
As soon as the barrage relented, the 48th Highlanders and the RCR made their respective attacks.
Initial progress was good for the Highlanders. D Company was able to quickly get over the river, but B Company’s advance was hampered by mortar and machine-gun fire. By the night of the 8/9th December, both companies were occupying high ground around San Leonardo.
In the night, the Royal Canadian Engineers had also managed to construct a bridge across the river. Soon, tanks and equipment were moving into San Leonardo.
As the 48th Highlanders pressed forth their attacks, the RCR was in action south of San Donato. Well-prepared German defences, manned by Panzergrenadiers, faced them. After being initially held up by accurate mortar fire, by nightfall, all four RCR companies were holding positions amongst San Donato’s German defenders.
Continuous artillery support meant any counterattacks were repelled.
Come morning the Royal Canadian Engineer’s bridge was complete. The 14th Armoured Regiment (Calgary Regiment) fired up its vehicles and headed for San Leonardo with two companies of Seaforth Highlanders in support.
San Leonardo was cleared of Wehrmacht defenders by mid-morning, although they continued to offer resistance outside the town. The Canadian tanks broke through these positions within an hour of crossing the river, linking up with the infantry in San Leonardo town centre.
Aftermath on the Moro
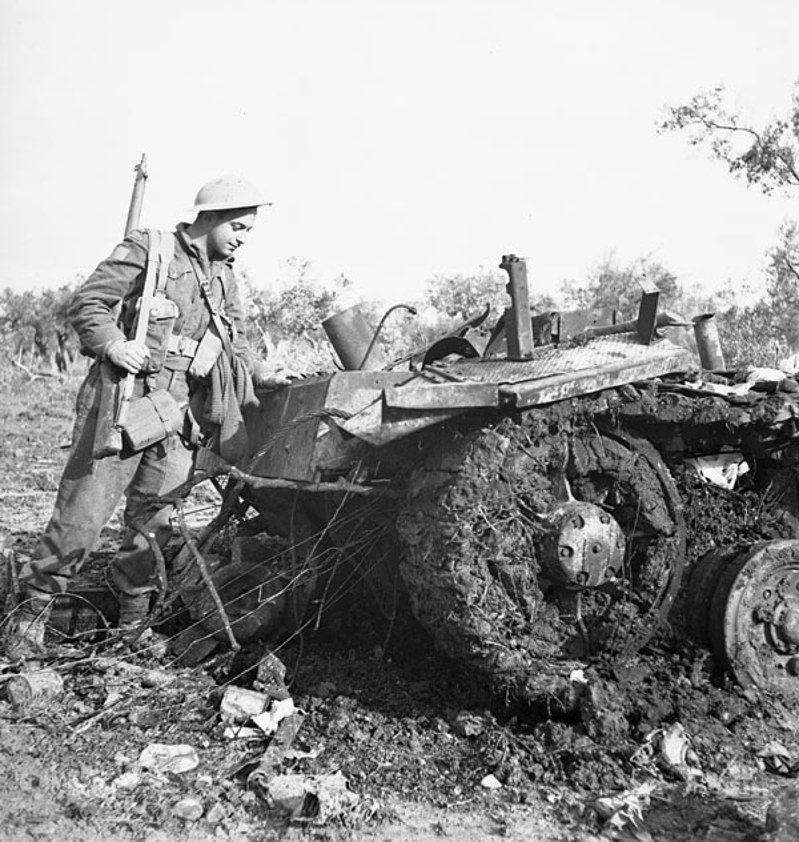
Image: A Canadian soldier stands next to a smashed German armoured fighting vehicle (© Libraries & Archives Canada)
Now, the Canadians had crossed the Moro in real force and established permanent beachheads to strike onwards towards Ortona.
It would take until the end of December before Ortona was in Canadian hands. The fighting in the town itself, and taking the huge geographical obstacle called “The Gully”, would take a heavy toll on the Canadians.
Ortano would dissolve into bloody, bitter street fighting. Compared with the infamous Battle of Stalingrad, the urban environment required different tactics. The Canadians used a process called “mouseholing” to essentially blast through each building and take them one by one.
650 were killed or wounded in Ortona alone, adding to the casualties already taken getting over the Moro.
The Impossible Bridge
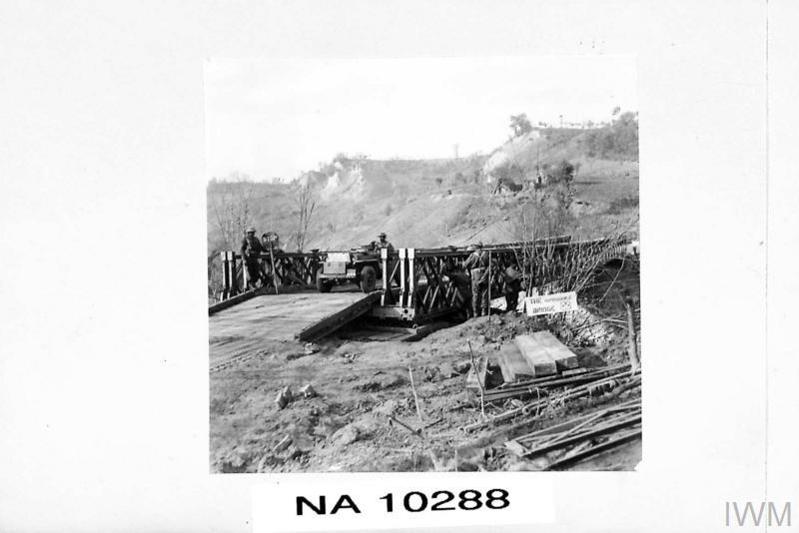
Image: The so-called Impossible Bridge built my Indian Army engineers over the Moro (© IWM NA 10288)
During the first stage of the Moro River campaign, the Canadian forces managed to establish themselves at Villa Rogetti.
Strong German formations surrounded the Villa Rogetti beachhead, restricting a potential breakout. Royal Canadian Engineers also reported now suitable areas were available for bridging with not enough room on their side of the riverbank to build in.
The Canadian assault forces were moved to other areas of the Moro front and replaced by the 8th Indian Infantry Division. While there, the 69th Field Company Bengal Sappers performed one of the Italian campaign’s most impressive feats of military engineering.
Ignoring the Canadian opinion on bridging suitability, the Indian engineers promptly crossed the Moro to the enemy-held bank and built a suitable bridge in the reverse direction, manhandling all required bridge elements themselves.
The so-called “Impossible Bridge” was completed on 9 December, giving the Allies yet another route over the Moro, flooding it with tanks and infantry.
Orsogna
While the Canadians and Indians were in action along the Moro River, the 2nd New Zealand Division was tasked with attacking Orsogna.
Orsogna lay on the left flank of the Moro combat area, held by tough German defenders. Like many towns and villages in Italy, Orsogna had been heavily fortified. Capturing it would not be easy.
Operation Torso, the attack on Orsogna, was launched at 14:30 on 7 December 1943.
Initially, the attack went well for the Kiwis. The German commander, Traugott Herr, had previously been told the New Zealanders wouldn’t be able to make any significant moves until the following day.
The Germans managed to get over their initial surprise and offer a spirited, organised resistance. By 21.00, the New Zealand 24th Infantry Battalion had made its way, house-by-house, reaching the town centre. Pinned down without the necessary armour support, the 24th Infantry Battalion’s advance stalled.
Outside Orsogna, craftily concealed minefields and well-positioned enemy tanks meant the Kiwis’ supporting armour couldn’t make it into the town.
Early on the morning of December 8, General Benard Freyberg, the New Zealander’s commander, ordered the withdrawal.
Orsogna was attacked again on 24 December. The defences proved formidable once again. Eventually, the sector around Orsogna devolved into deadlock, especially as the appalling Italian winter of 1943 set in.
Casualties and Commemoration of the Moro River Crossing
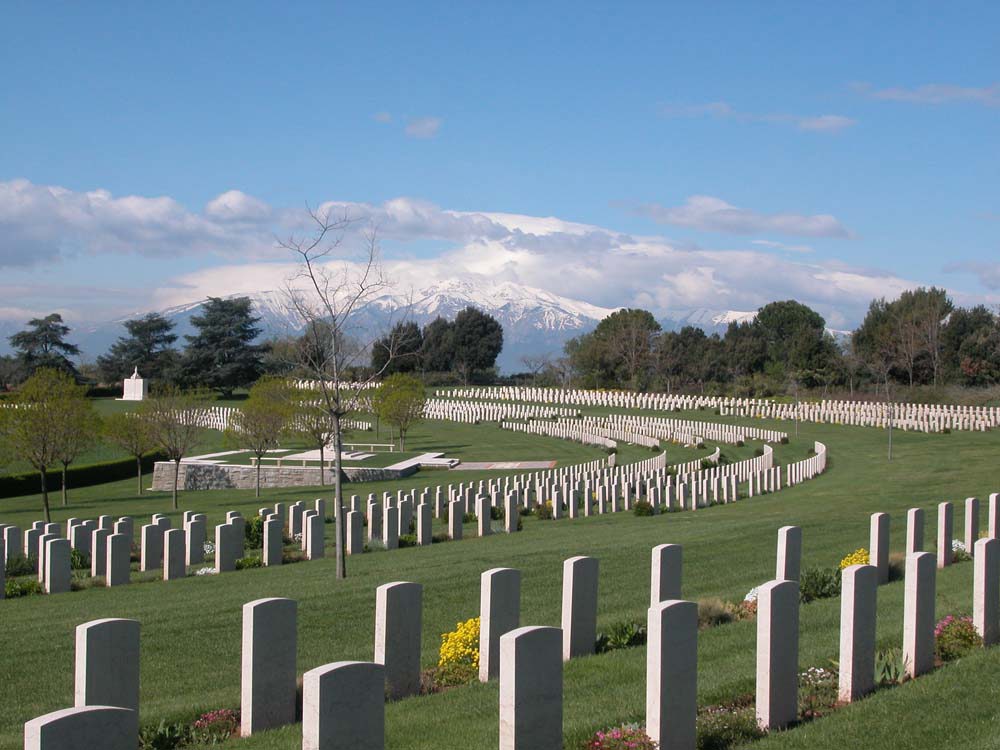
Image: Sangro River War Cemetery where further casualties from the Adriatic Coast clashes are commemorated.
The nature of fighting in Italy often led to heavy casualties. The terrain favoured the defenders, with rivers like the Moro providing natural, easily defendable positions for the Axis forces.
The crossing of the Moro resulted in over 7,300 losses for the Commonwealth, including killed, captured, wounded or missing, split thus:
- 2,339 – Canadian
- 1,600 – New Zealand
- 3,400 – Indian
Up to and including the capture of Ortona, the Canadian Division lost 1,375 men killed.
One of the key points of commemoration of the campaign is the Moro River Canadian War Cemetery.
As discussed, while the bulk of the burials at Moro River are Canadian, the Commonwealth nations all have fallen eternally residing there.
The site was originally chosen by Canadian military authorities in January 1944 to hold casualties from the fighting at Ortona and subsequent battles.
Another important place containing the war graves related to the Moro crossing is Sangro River War Cemetery.
Some 2,617 Commonwealth burials lie within Sangro River War Cemetery. It was built to contain burials from the Adriatic battles between November and December 1943, which incorporates the clash at the Moro River.
Within Sangro River War Cemetery lies the Sangro River Cremation Memorial. This commemorates more than 500 Commonwealth servicemen who were cremated in accordance with their faith, reflecting the multinational makeup of the Commonwealth armies fighting in Italy.
Find more Canadian memorials to visit.
Lieutenant Harry Goslin
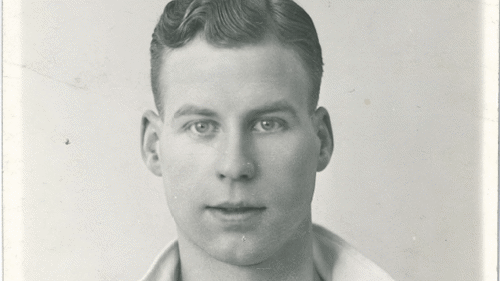 Image: Lieutenant Harry Goslin: A "Wartime Wanderer" (© Bolton Wanderers FC)
Henry Goslin, known as Harry, was born 9 November 1939.
Before the Second World War, Harry was one of the key members of the Bolton Wanderers team of the thirties.
Between 1930 and 1939, Harry made 306 appearances for Bolton, scoring 26 goals.
At a match held at Bolton’s home ground Burnden Park on April 8, 1939, still some months before Britain declared war on Nazi Germany, Harry addressed the crowds saying after the game, he and the rest of the Bolton side would be joining the Territorial Army.
Come the declaration of War in September 1939, Harry and his teammates, the Wartime Wanderers as they were known, were assigned to the 53rd (Bolton) Field Artillery Regiment of the Royal Artillery.
The unit saw action in France and North Africa before reaching Italy in 1943.
During the fighting on the Moro, the 53rd (Bolton) Field Artillery was in support of the Eighth Indian Division. Harry was present at the construction of the Impossible Bridge as one of the forward artillery officers helping coordinate artillery cover.
On the 14th, the Indian Army positions in the centre of the Allied line came under heavy fire, with bombs striking the line.
Harry’s observation post (OP) was hit by frenzied mortar shelling. An enemy mortar became lodged in a tree under which Harry was sheltering. Its delayed fuse went off shortly after, hurling shrapnel and wood into Harry’s back.
Harry was initially paralysed and evacuated for treatment. He struggled against his injuries for four days before finally passing away.
Harry is buried in Sangro War Cemetery. He was the only Wartime Wanderer to lose his life in the Second World War, although several of his teammates were injured during their time in service.
Discover more about Commonwealth War Graves in Italy
Our search tools can help you learn more about those we commemorate in Italy.
Want to learn more about the fallen Commonwealth soldiers we commemorate there? Our Find War Dead tool can help. Simply filter by country to discover the Second World War casualties in our care.
If you’d like to learn more about the sites in Italy we maintain, use our Find war Cemeteries & Memorials tool. Each cemetery page details the number of casualties it commemorates, visiting information, and more.
What will you discover?